

Best Party For Every Boss in Genshin Impact: Since its debut in September 2020, Genshin Impact has taken the gaming community by surprise. Initially viewed as just another free-to-play imitation of Breath of the Wild, it has gained recognition for its vast open world, engaging gameplay loops, and gacha features. The developers have been diligent in providing frequent updates, and the future development roadmap for Genshin Impact is indeed promising.
Gamers seeking to advance their characters will soon realize that engaging in regular boss battles is a critical component of the game. These encounters offer vital rewards that are essential for promoting each character to a higher level. Depending on their Elemental specialization and other considerations, each character in Genshin Impact necessitates specific ascension materials that are obtained from bosses. Consequently, it is essential for players to consistently confront all the bosses in the game and to establish a party arrangement that ensures the battles are as efficient and uncomplicated as possible.
Best Party For Every Boss in Genshin Impact
1. Geo Hypostasis
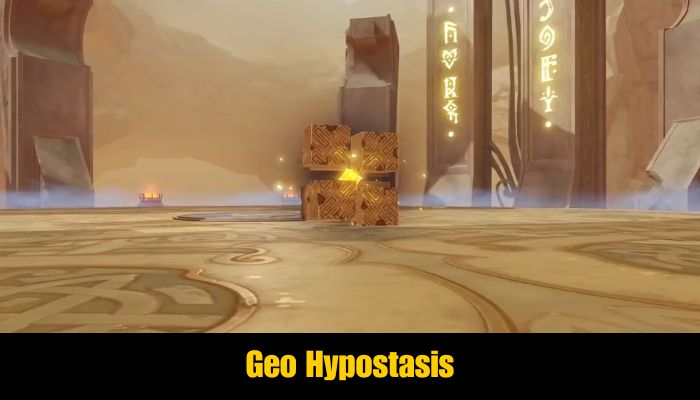
- Enemy’s Weakness: Heavy attack (Claymore, Geo, explosion)
- Main DPS: Ganyu
- Support: Zhongli, Shenhe
- Healer: Bennett
In Genshin Impact, players can defeat Geo Hypostasis by targeting and destroying the three Pillars it summons when its health is critically low. During the encounter, the boss remains positioned atop these stone pillars, necessitating the use of characters capable of efficiently demolishing them or employing ranged attacks. The pillars can be shattered using powerful blunt force, which can be delivered by Claymore weapons, explosive devices, or Geo abilities.
The most effective method to defeat this boss is to employ Ganyu for ranged attacks while ensuring that the pillars are not destroyed. Zhongli should be used to provide a shield, and Bennett can be utilized to enhance damage for a quicker resolution. Once the boss attempts to revive, players can activate Zhongli’s hold Skill to immediately take down two of the three Stone Pillars that the boss summons. The last Pillar can be eliminated by either Zhongli’s Burst or the melee attacks of Shenhe or Bennett.
2. Oceanid
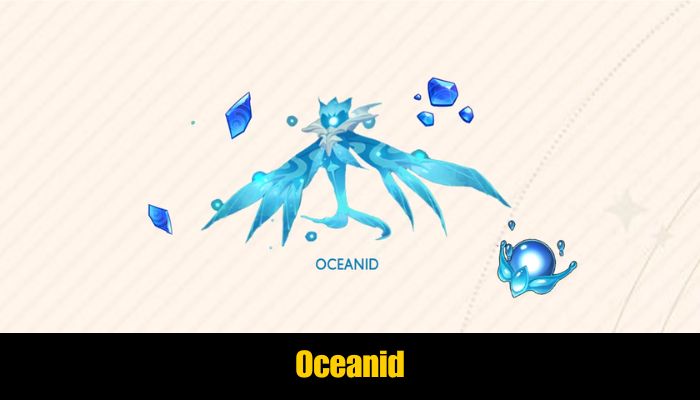
- Enemy’s Weakness: None
- Main DPS: Ganyu
- Support: Fischl, Shenhe
- Healer: Qiqi
In Genshin Impact, the Oceanid stands out as a distinct enemy, markedly different from the other bosses encountered. This unusual being does not attack players directly; instead, it calls forth water-based creatures to address the threat. The Oceanid avoids direct confrontation, and its health decreases as the player defeats the ever-growing waves of Hydro entities.
Players are recommended to bring a ranged character when facing the Oceanid’s Hawk Mimic, as it can be quite challenging to strike the birds without one. For this particular challenge, players can either deploy Ganyu to ensure a constant freeze effect throughout the fight or utilize Fischl, coordinating her ranged attacks with those of Oz.
3. Cryo Regisvine
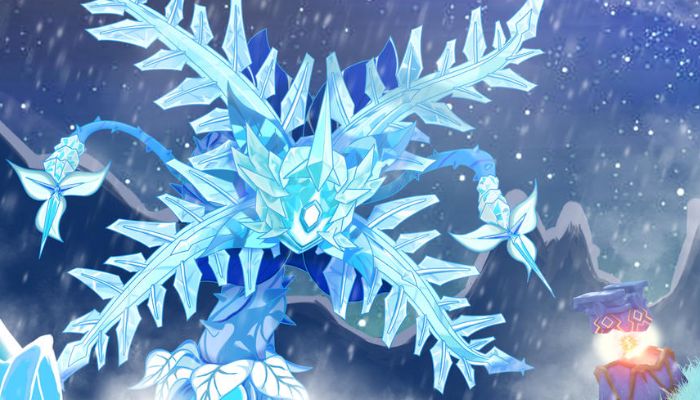
- Enemy’s Weakness: Pyro attack
- Main DPS: Hu Tao
- Support: Zhongli, Xingqiu, Yelan
- Healer: None
The Cryo Regisvine is typically the initial boss encountered by numerous players in Genshin Impact. It can be found in proximity to Mondstadt, specifically to the south of the Thousand Winds Temple. While there are various strategies for engaging this boss, employing a Pyro character is considered the most efficient approach.
If players have an adequate amount of Pyro to dismantle the boss’s core, the encounter should be manageable, enabling the selection of characters like Xiangling or Hu Tao. After the boss is vanquished, players should focus on inflicting as much damage as possible.
4. Pyro Regisvine
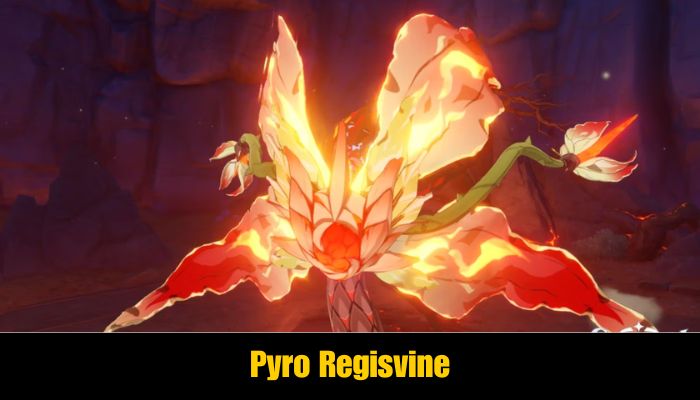
- Enemy’s Weakness: Hydro attack
- Main DPS: Tartaglia (Childe)
- Support: Sucrose, Mona
- Healer: Bennett
This aggressive plant serves as a challenging adversary, primarily due to its capability to launch targeted missiles at players from the onset of the encounter. The optimal elemental combination to employ against Pyro Regisvine is Hydro and Cryo; however, certain characters can greatly enhance your likelihood of a swift victory, irrespective of their elemental affiliation. Consequently, Bennett, although classified as a Pyro character, is an essential asset to the team when facing this boss. His Elemental Burst provides an ATK boost to all party members, contingent upon their health being above 70%, thereby amplifying the impact of Tartaglia’s ranged Hydro attacks.
5. Pyro Hypostasis

- Enemy’s Weakness: Hydro attack
- Main DPS: Kokomi
- Support: Xingqiu, Yelan
- Healer: Zhongli
In contrast to the standard Hypostasis, the Pyro variant possesses a Pyro shield that must be dismantled to expose its core. To accomplish this task, players are advised to employ Hydro catalyst characters such as Barbara, Mona, or Kokomi. Additionally, the Pyro Hypostasis will continuously generate Fire Seeds that require elimination through a single Hydro attack.
A character such as Zhongli or Thoma, who can provide shielding, will be extremely beneficial in breaking through the boss’s shield. Aside from this, the strategy for defeating the boss remains consistent with that used against regular hypostasis.
6. Hydro Hypostasis
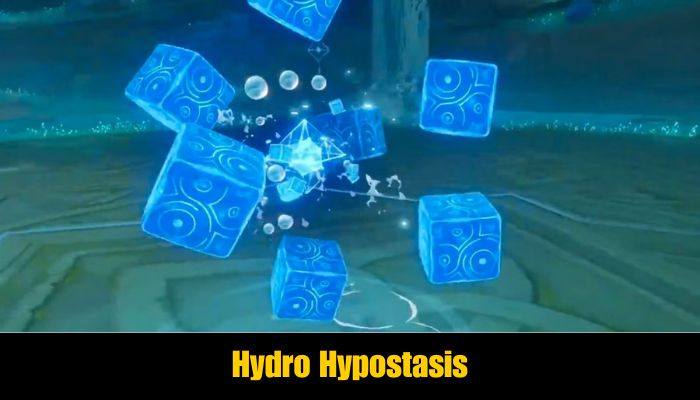
- Enemy’s Weakness: Cryo or Dendro against the small Slimes
- Main DPS: Hu Tao
- Support: Ayaka, Xiangling
- Healer: Yaoyao
Reflecting the Hydro identity, this boss is accompanied by small healers that aid it in combat. These minions appear as Slimes and will continuously spawn throughout the fight. If players fail to manage them, the boss will heal itself repeatedly. Various Elemental reactions can be employed to eliminate the Slimes, with Frozen and Bloom being the most effective options. Characters such as Ayaka or Nahida are best suited for this endeavor.
7. Cryo Hypostasis
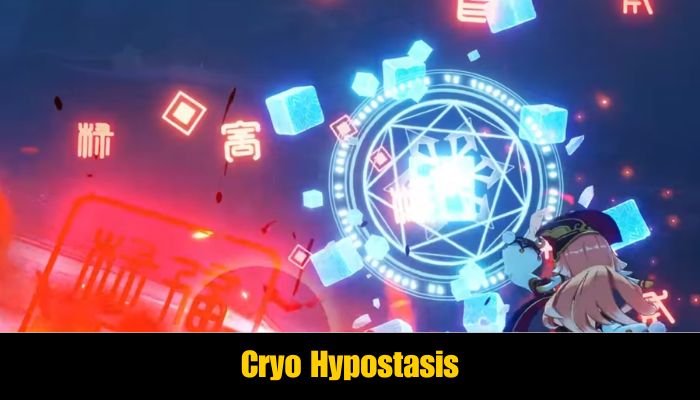
- Enemy’s Weakness: Charged attack
- Main DPS: Hu Tao
- Support: Xiangling
- Healer: Diona
In relation to this boss, Hu Tao can effectively inflict Melt damage upon the core of the Cryo Hypostasis. This characteristic also makes Xiangling a valuable sub-DPS contributor. Diona’s Cryo shield is particularly efficient against Cryo attacks, and she can additionally act as a healer when the circumstances call for it.
After the Glacial Shield phase begins, the enemy will relentlessly distribute Frostfruits throughout the combat area. Players must engage in Charged attacks to roll these fruits towards the boss.
8. Maguu Kenki
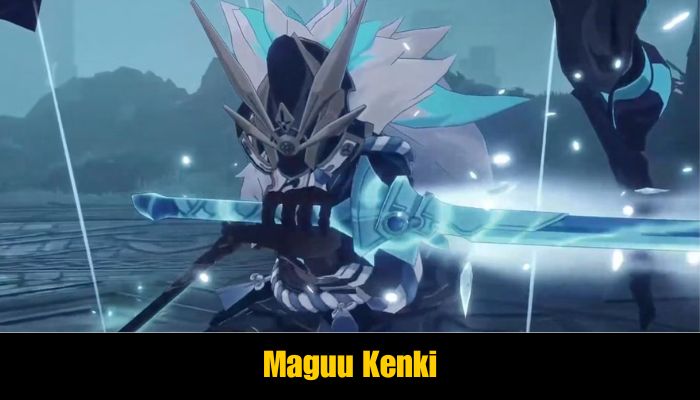
- Enemy’s Weakness: None
- Main DPS: Hu Tao
- Support: Xingqiu, Zhongli
- Healer: Any
Maguu Kenki is often deemed one of the most challenging bosses, primarily due to its unclear invincibility frames. This means that during the casting of specific skills, the boss is rendered immune to damage. The initial step in defeating this mechanical opponent is to comprehend the timing of its invincibility frames.
This boss is known to parry ranged attacks, which implies that melee units will perform more effectively against it. By employing Hu Tao and Xingqiu together, players can successfully chip away at the boss’s health while keeping a close distance.
9. Perpetual Mechanical Array
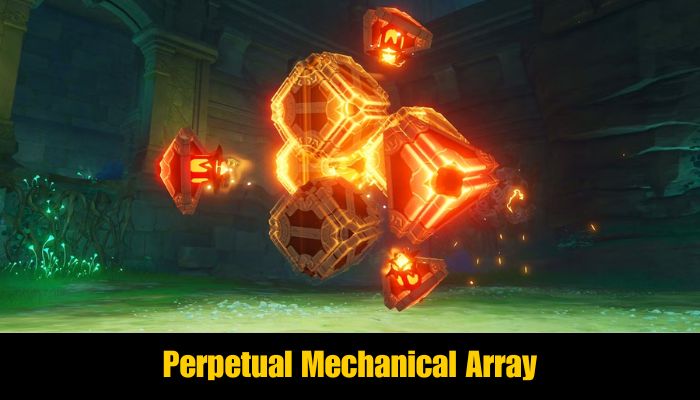
- Enemy’s Weakness: None
- Main DPS: Hu Tao
- Support: Xingqiu, Yelan, Zhongli
- Healer: None
The optimal approach for the Perpetual Mechanical Array is to employ brute force. Once the boss’s health points are sufficiently reduced, it will transition into an invulnerable phase, during which four distinct Automatons will emerge. Among these, one will be adorned with a golden ring. This particular adversary is the target that Travelers must eliminate.
Upon the defeat of the designated Automaton, the Perpetual Mechanical Array will enter a phase of temporary shock. It is at its most exposed during this time, and players should capitalize on this opportunity to attack with full force.
10. Thunder Manifestation

- Enemy’s Weakness: None
- Main DPS: Ganyu
- Support: Zhongli
- Healer: Diona
Just as the Golden Wolflord is known for its energetic movements, this Electro boss also displays a notable propensity for jumping. Thus, players are encouraged to opt for a bow or catalyst character for their main DPS role.
This boss is capable of inflicting heavy Electro damage when enraged, which underscores the importance of having a shielder like Zhongli. It is advisable for players to steer clear of healers that apply elemental effects. For example, Barbara can cause Travelers to become Electro-Charged, and Bennett’s Pyro self-application could result in ongoing Overload. In this context, Diona is recognized as the safest healer available.
11. Golden Wolflord

- Enemy’s Weakness: Geo attack
- Main DPS: Ningguang
- Support: Xingqiu and Yelan or Zhongli
- Healer: Barbara
The primary strategy for defeating the Golden Wolflord involves deploying a Geo unit to take out its Rifthound Skulls, thereby stripping away the boss’s shield. Although any Element is capable of performing this function, Geo proves to be the most effective.
To successfully confront the Golden Wolflord, it is imperative for Travelers to select units proficient in ranged attacks. Given that the Golden Wolflord often elevates itself beyond the reach of melee combat, utilizing a bow user like Ganyu or a Catalyst user such as Ningguang is optimal. Furthermore, players should ensure they have a dedicated healer to counteract the Corrosion debuff, with Barbara proving to be an outstanding option for this purpose.
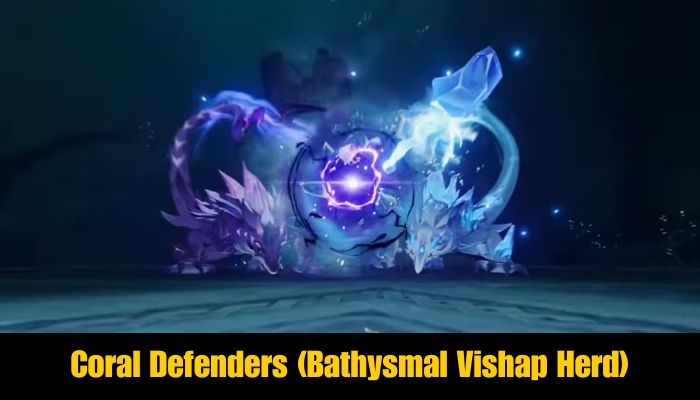
12. Coral Defenders (Bathysmal Vishap Herd)
- Enemy’s Weakness: None
- Main DPS: Hu Tao
- Support: Xingqiu, Yelan, or Zhongli
- Healer: Diona
The Coral Defender is available in pairs and possesses no significant vulnerabilities. However, players should consider certain factors before engaging in combat with them.
- At the commencement of the battle, the boss will leap following the completion of its initial move; therefore, it is essential to conserve your Elemental Burst.
- One of the Vishap will leap onto the wall to provide distant support for the other adversary. To incapacitate the Vishap, it is necessary to demolish the wall with powerful strikes.
13. Ruin Serpent
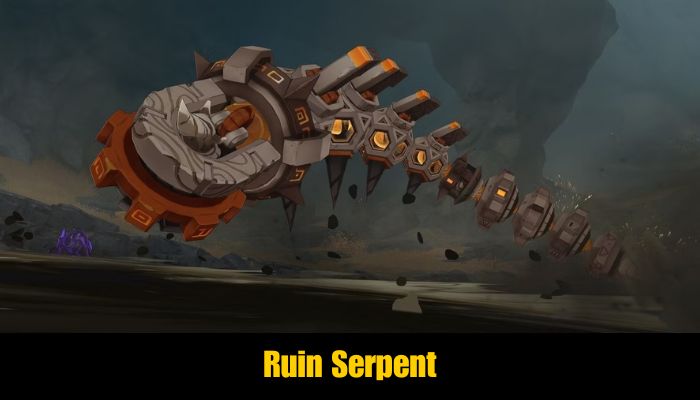
- Enemy’s Weakness: Having surrounding Oozing Concretions removed while it’s drawing power from it
- Main DPS: Non-Physical Ranged Character
- Support: Any
- Healer: Any
The Ruin Serpent tends to remain concealed beneath the surface for extended periods, making it advisable to avoid characters that necessitate mobility to engage the enemy. Players may consider utilizing damage-per-second (DPS) characters such as Ganyu or Tighnari for optimal performance. Recommended team compositions include Ganyu, Shenhe, Kazuha, and Bennett, or Fischl, Tighnari, Kujou Sara, and Raiden Shogun.
The boss can be successfully defeated without any unique approach; however, if it tries to extract energy from the nearby Oozing Concretions, players must activate their Lumenstone Adjuvant to clear the filth, which will subsequently stun the boss.
14. Electro Regisvine
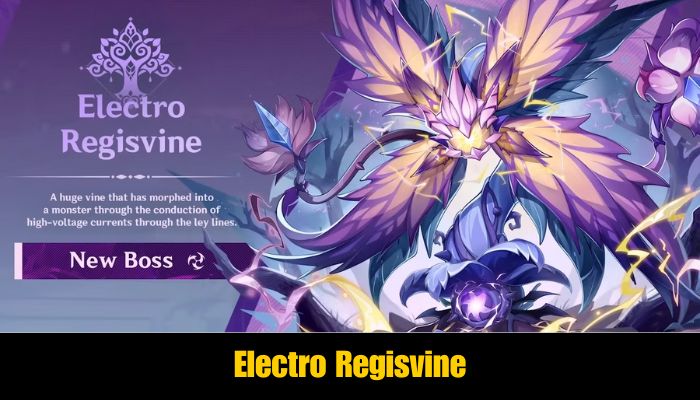
- Enemy’s Weakness: Pyro, Cryo, and Dendro attack
- Main DPS: Ganyu, Tighnari, or Yoimiya
- Support: Zhongli
- Healer: Bennett
The Electro Regisvine’s weak point will first manifest on its head, so it is recommended to deploy a ranged character like Ganyu, Tighnari, or Yoimiya. Furthermore, each time the boss activates its weak point, it will generate a stamen on the field that should be destroyed using an Elemental reaction. If the stamen is not dealt with, the two stamens will collide and trigger a devastating explosion when the boss relocates its weak point.
15. Aeonblight Drake
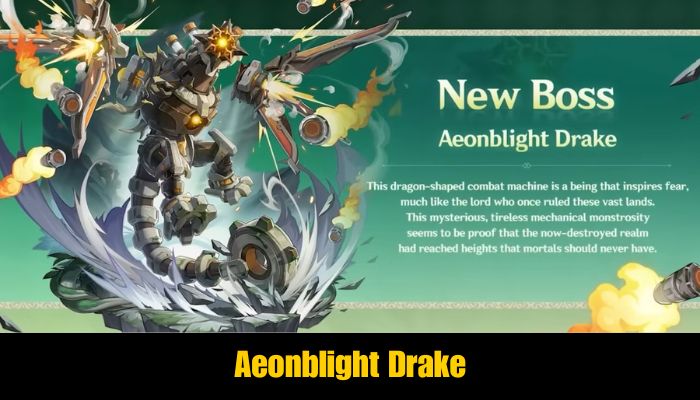
- Enemy’s Weakness: One weak point on the head and two on the wings
- Main DPS: Nahida
- Support: Yelan, Nilou
- Healer: Yaoyao
The Nilou Bloom team, frequently undervalued, possesses significant strength and is capable of defeating the Aeonblight Drake before it attempts to take flight. Should players achieve this remarkable feat, it is advisable to utilize a ranged unit to target the boss’s weak point, which will result in the machine descending from its airborne position.
16. Dendro Hypostasis
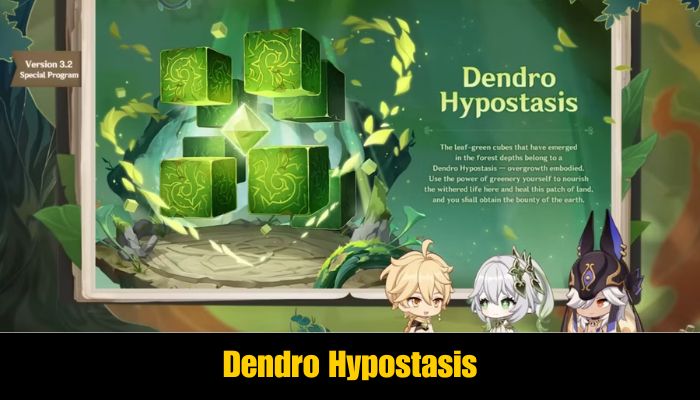
- Enemy’s Weakness: Dendro and Electro
- Main DPS: Raiden Shogun
- Support: Kujou Sara, Nahida
- Healer: Kuki Shinobu
When the Dendro Hypostasis’s health reaches a low threshold, it will make an effort to restore itself. To prevent this revival, players are required to strike the wilted plant with Dendro energy, followed by an Electro attack to activate it. While it is feasible to solely use Dendro on the plant, employing Electro will expedite the process significantly. Given the necessity of a Dendro strike, utilizing Nahida is advisable, as Catalyst users can effectively control the Element through their basic attacks.
17. Setekh Wenut
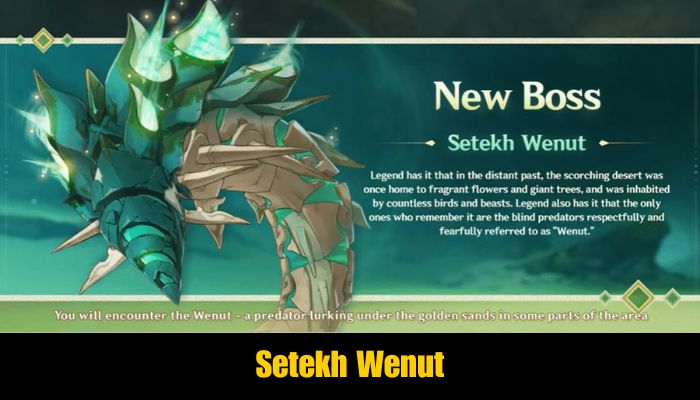
- Enemy’s Weakness: Ranged hitter or large AoE hit
- Main DPS: Tighnari
- Support: Raiden Shogun, Kujou Sara, Yae Miko
- Healer: None
Similar to the Ruin Serpent, the Setekh Wenut predominantly resides underground, making it advisable to avoid utilizing units that depend on Elemental Burst, such as Xiao or Itto. The boss can be incapacitated by detonating the Windbite Bullets it generates. When the opportunity arises, players should employ Cryo, Hydro, Pyro, or Electro to strike the Bullets. For this purpose, players may opt for a ranged character like Ganyu or Kujou Sara, or select characters with substantial AoE capabilities, such as Raiden Shogun’s Burst.
| Genshin Impact | Genshin Impact Codes | Genshin Impact News |
| Genshin Impact Tier Lists | Genshin Impact Tips & Guides | Homepage |